Previous post: How to Make Madder Lake, part 2.
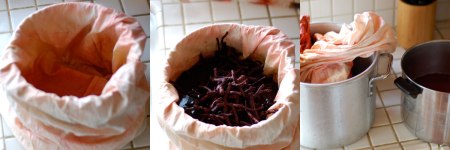
After allowing the dye bath to cool down, you need to separate the roots from the liquid. Take a clean cloth sack – I use a pillowcase I bought for this purpose – and put it into a bucket with the top of the sack wrapped out over the lip, as shown below:
You can tell I’ve used that pillowcase a few times before – both for madder and for weld! Pour the dye bath into the bucket and sack, then slowly lift out the bag of roots. You want to squeeze these out somewhat as you’re removing them – there’s a lot of liquid being held in there. When you’re done, you can toss out the roots (I mean, put them in the mulch box, of course!) and wash out the cloth bag – you don’t need them anymore. From here on out, we’ve finished with the hard part; the rest is just following standard lake-making procedure.
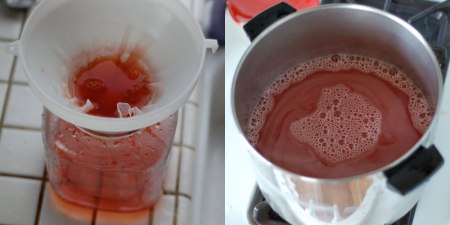
Next we’ll filter the dye water. The purpose of the bag was to keep root bits and bark gunk out of the dye, but we’re going to make sure it’s as clean as possible. Once we get to the next step, any remaining contaminants are in there for good. Put the funnel over one of your jars and place a wet coffee filter in the funnel. (Getting the filter wet beforehand makes it easier to make it cling to the walls of the filter, which makes it easier to pour the dye water into it.) Pour and wait. Find something else to do for a few minutes; it can take a bit for the dye to filter through. When the funnel has emptied, pour again. I recommend using a new filter for each pour. Repeat until all the liquid has been filtered.
When that is finished, you can wash out the pot that was used to hold the plastic bucket, and pour the dye water into it. Warm it back up a bit – again, be careful not to go over 170º – and then add the alkali. This is either washing soda or potash. I’m using washing soda here. You want to measure perhaps a quarter the weight of the alum that you used. Pour it in slowly, stirring, over a little heat. The dye bath will turn cloudy red, and perhaps give off some pink foam at the top. This is the madder lake pigment forming!
After a few minutes, when there’s no more foaming action, allow the liquid to cool. In fact, let it sit, covered, for a few hours, or even overnight. The pigment will settle somewhat to the bottom. We’re going to wash it a few times. Here’s how you do it. Carefully pour the separated liquid off the top, then refill with clean water. Let the pigment settle. Pour the separated liquid off, refill, allow to settle. Do this until the separated liquid is clean and clear.
Home stretch now. After a final settling, pour off as much of the separated liquid as you can; then we’re back to filtering. Put the funnel over a jar, and a wet coffee filter into the funnel, then fill up the filter with pigment water. Go do something else for a while. After some time, the coffee filter will have a somewhat thick residue of deep red, wet pigment. Pull the filter out of the funnel, spread it out and lay it somewhere to dry. (Laying it on a brick works well; the absorbency of the brick pulls out the moisture more quickly.) Repeat until all of the pigment water is used up, and you have various paper dishes of pigment drying around the house.
That’s it! You’ve done it! When the pigment dries, it will be a much lighter shade of pink. Don’t worry about that – once you’ve gotten it into one of its preffered binders, oil or gum arabic, it will regain all of that intensity. In the next post I’ll give the pigment a good grind and try it out in a painting!


